
Exploring Large Language Model with Slack Bot
Introduction
This mini-project is heavily inspired by a guide written by Dave Ebbelaar titled “Slack AI Assistant with Python & LangChain” and from his YouTube video “How I Supercharge Slack With Custom AI Bots”
I’ve been wanting to create my own Slack Chat bot with some type of intelligence behind it and not only restricted to the algorithms I implement. I also wanted to explore the capabilities of GPT and see how it can be used in a real-world application.
So I decided to create a Slack bot that uses GPT to generate a more naturally sounding response given a simple prompt as a personality, provide data gathered from Slack, and a very crude template of what the response could be.
Making the AI Slack Bot
Objectives
- Give a summary on the pending code review requests. A code review request is a simple message from a Slack channel. Usually the format is
"[Brief description]\nPR: [link to the PR]\nTarget: [release version]"- Identify high priority. It is high priority when it includes some keywords or explicitly says high priority.
- Rank requests based on age. There is a unix timestamp on messages.
- Rank requests based on target release. A target release starts with the text “Target: "
- Here is an Example of the output:
Hello there fellas!
We have 3 requests that are high priority:
1. Request 1
2. Request 2
3. Request 3
And these requests are pending for review for quite some time now
1. Request 9
2. Request 10
As we are approaching the next release 1.99, let's try our best to spend time reviewing these tickets:
1. Request 11
2. Request 12

A review a day keeps the bugs away! Or something like that ;-)

Have a nice day!
- The message is a pinned message from a Slack channel.
- Here is an example of the message input:
"Hi guys. This is John's PR to fix the bug in the UI.\nPR: [link to the PR]\nTarget: [release version]" - A release version is a simple text
"1.10", "1.10.1", "1.11", "1.11.1", "1.12", or "1.12.1"
Implementation
For this quick project, I used the following tech stack:
- Flask
- Langchain
- Slack SDK and Slack Bolt
As a general outline of the TODOs:
- Setup Slack
- Setup Server
- Custom functions
Setup Slack
This one is pretty straightforward. Here are the things we need to setup:
- A Slack workspace to test the application
- A Slack application
- A Slack bot to respond in behalf of the application
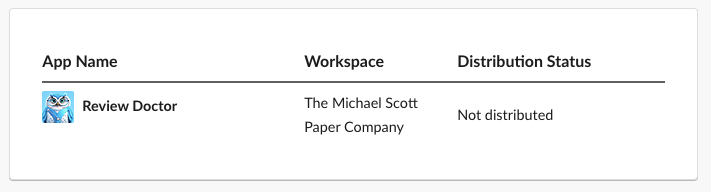
As you may have guessed, I used AI to generate the application’s image.
The prompt is as follows:
An illustration of an Owl dressed as a doctor with a stethoscope around its neck. The Owl should be wearing a white lab coat and a pair of small round glasses. The background should be a shade that complements the color blue, creating a calming and professional atmosphere. Ensure that the image is suitable for a Slack profile picture, with dimensions of 512x512 pixels and a resolution of 72 pixels per inch.

As with any early generative AI, it’s not perfect but it’s good enough for me. It did not follow the last bit of instruction to constraint the image to 512x512 pixels. But that can be easily fixed with a simple image editor.
From the application itself we needed a few things to take note of for the later implementation:
- Slack Bot Token. This is the token that will be used by the bot to respond to messages. Get this from App > OAuth & Permissions > Bot User OAuth Token (starts with
xoxb-) - Slack Signing Secret. This is the token that will be used to verify that the request is coming from Slack. Get this from App > Basic Information > Signing Secret.
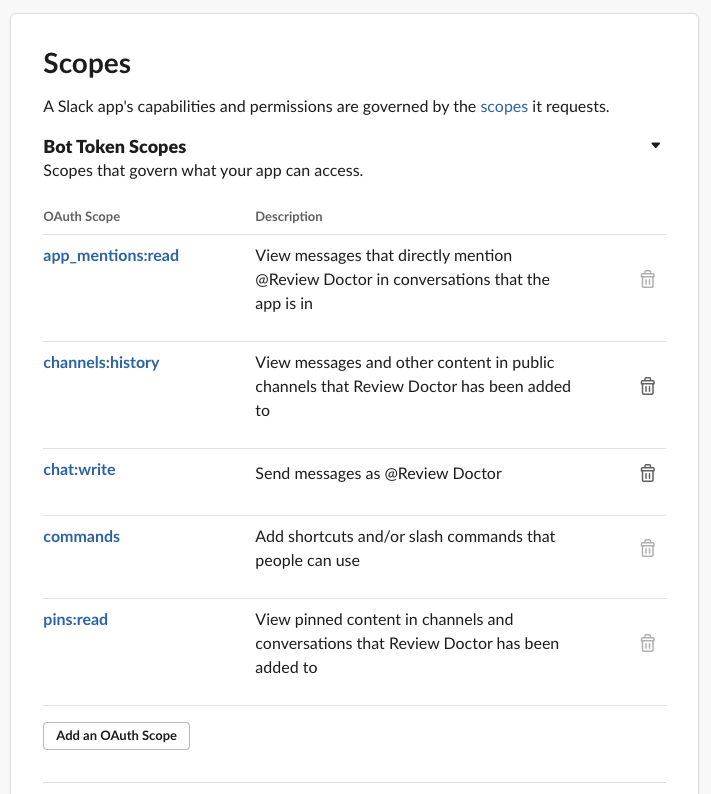
The bot itself also needs some permissions to be able to read messages and send messages, and gather pinned messages. This can be configured in App > OAuth & Permissions > Scopes.
Setup Server
Before diving into the code, it is important we understand how data flows in and out of the application. Here is a simple diagram of the flow:

Flow:
- Slack sends a request to the application
- The application responds ACK to Slack. A small time window to respond is enforced by Slack. If the application does not respond within the time window, Slack will consider it as an error. Our application will still be able to respond at a later time with the context provided the channel ID.
- The application pre-process the message, and sends instructions to the LLM.
- The LLM generates a response.
- The application post-processes the response.
- And finally, sends a response to Slack.
From this bit, we only have one thing to go back to Slack.
We need to know the URL of the running application to direct our
commands. On to the next section!
The Server Code
The server code is pretty straightforward. It is a simple Flask application that uses the Slack Bolt SDK to handle the Slack events.
import os

from dotenv import find_dotenv, load_dotenv
from flask import Flask, request

from slack_bolt import App
from slack_bolt.adapter.flask import SlackRequestHandler

# Load environment variables from .env file
load_dotenv(find_dotenv())

# Slack API credentials
SLACK_BOT_TOKEN = os.environ["SLACK_BOT_TOKEN"]
SLACK_SIGNING_SECRET = os.environ["SLACK_SIGNING_SECRET"]
SLACK_BOT_USER_ID = os.environ["SLACK_BOT_USER_ID"]

# Initialize the Slack app
app = App(token=SLACK_BOT_TOKEN)
# ... and the Slack request handler
handler = SlackRequestHandler(app)
# Initialize the Flask app
flask_app = Flask(__name__)


# Listen to incoming HTTP requests
@flask_app.route("/summarize", methods=["POST"])
def listen_to_command_summarize():
    """
    Route for handling Slack events.
    This function passes the incoming HTTP request to the SlackRequestHandler for processing.

    Returns:
        Response: The result of handling the request.
    """
    # Relay request to SlackRequestHandler
    return handler.handle(request)


# Let SlackRequestHandler handle /summarize command
@app.command("/summarize")
def summarize_pr_requests(ack, respond, command):
    ack()
    response = summarize_requests(command)
    respond(response)


# Run the Flask app
if __name__ == "__main__":
    flask_app.run()
After this, run the Flask app and spin up NGROK to expose the application to the internet.
python app.py
And on a separate terminal
ngrok http 5000
Copy the URL from NGROK and paste it in the Slack App > Slash Commands > Request URL > Create New Command
Fill-in the fields
Command: /summarize
Request URL: (Paste the URL provided by NGROK)
Feel free to fill in the rest of the fields.
LangChain
LLM is new to me. I’ve had Machine Learning classes back in college but I never really dived into NLP and its applications. So for me exploring LangChain rekindles the experience of learning AI again and it’s pretty exciting.
According to the documentation, “LangChain is a framework for developing applications powered by language models.”
For the application, LLM is to be used for a singular goal: summarize the pending code review requests in a natural sounding way.
The first step is to install LangChain and since the model I’d be using is gpt-3.5-turbo by OpenAI, I’d be installing openai too.
pip install langchain openai
Next, we need to prepare a few things for the LLM to work. Particularly for OpenAI. For other LLMs you may need to do other things (next up we are going to use Ollama).
- Create an OpenAI account
- Create an OpenAI API key
- Save the API key in our .env file
OPENAI_API_KEY=sk-**********
Then, for the core. In the summarize_requests function, we need to do the following:
- Create an LLM instance
- Create a prompt
- Provide the prompt to the LLM instance
- Get the response
A very good example that demonstrates a similar flow is Figma’s document loader example.
For us though, it’d be very simple. First, we import everything we need.
# functions.py
from dotenv import find_dotenv, load_dotenv
from langchain.chains import LLMChain
from langchain.chat_models import ChatOpenAI
from langchain.prompts.chat import (ChatPromptTemplate,
                                    SystemMessagePromptTemplate)

# Load environment variables from .env file
load_dotenv(find_dotenv())
We define the chat model and give it a “personality”.
# functions.py

def cooler_summary(summary: str):
    chat = ChatOpenAI(model_name="gpt-3.5-turbo", temperature=1)

    template = """
You are a funny and cool Project Manager. Your name is Review Doctor.

So make this message cool sounding to request for code review
to the programmers. And at the end of the message insert a short joke about
the topics: programming, coding, and code review.
Note, do not loose any links. A link in Slack mkdwn format is
<http://www.example.com|This message *is* a link>
So make sure to keep the link and the text.

{summary}
"""
    system_message_prompt = SystemMessagePromptTemplate.from_template(template)
Finally we provide the prompt to the chain and get the response.
# functions.py

    chat_prompt = ChatPromptTemplate.from_messages(
        [
            system_message_prompt,
        ]
    )

    chain = LLMChain(llm=chat, prompt=chat_prompt)
    response = chain.run(
        summary=summary,
    )
    return response
Using the AI Slack Bot
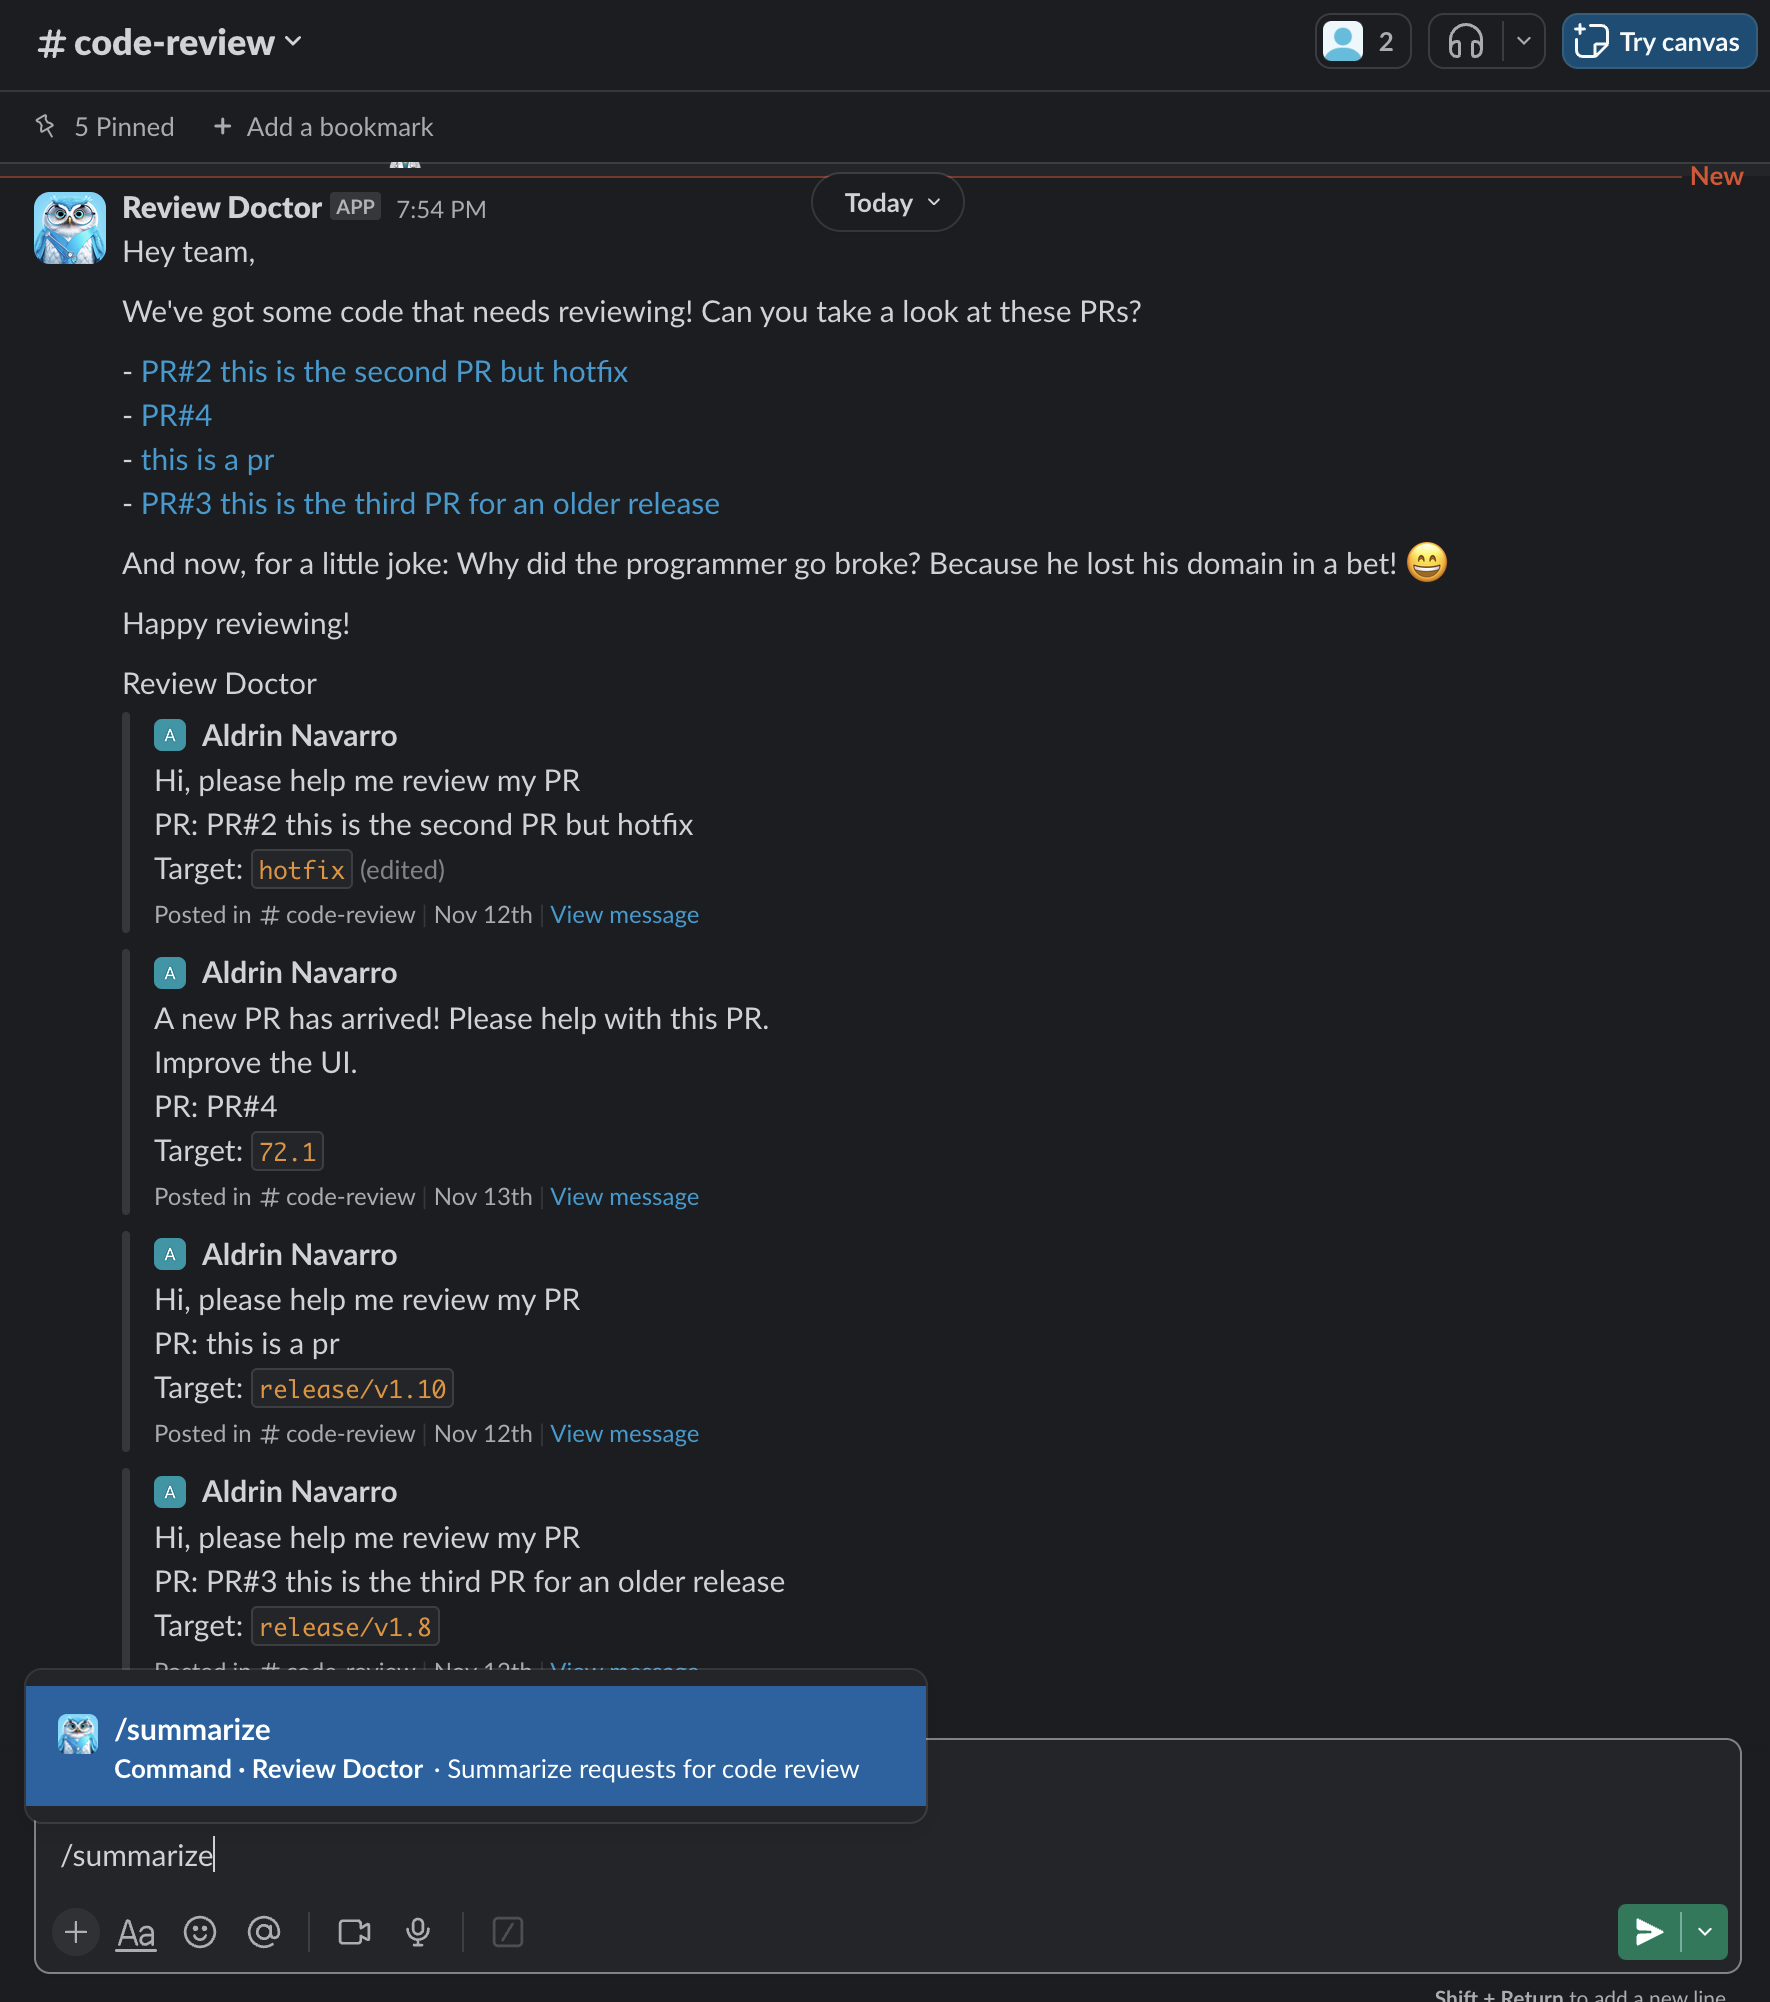
For now, I am able to interact with the bot using a slash command /summarize.
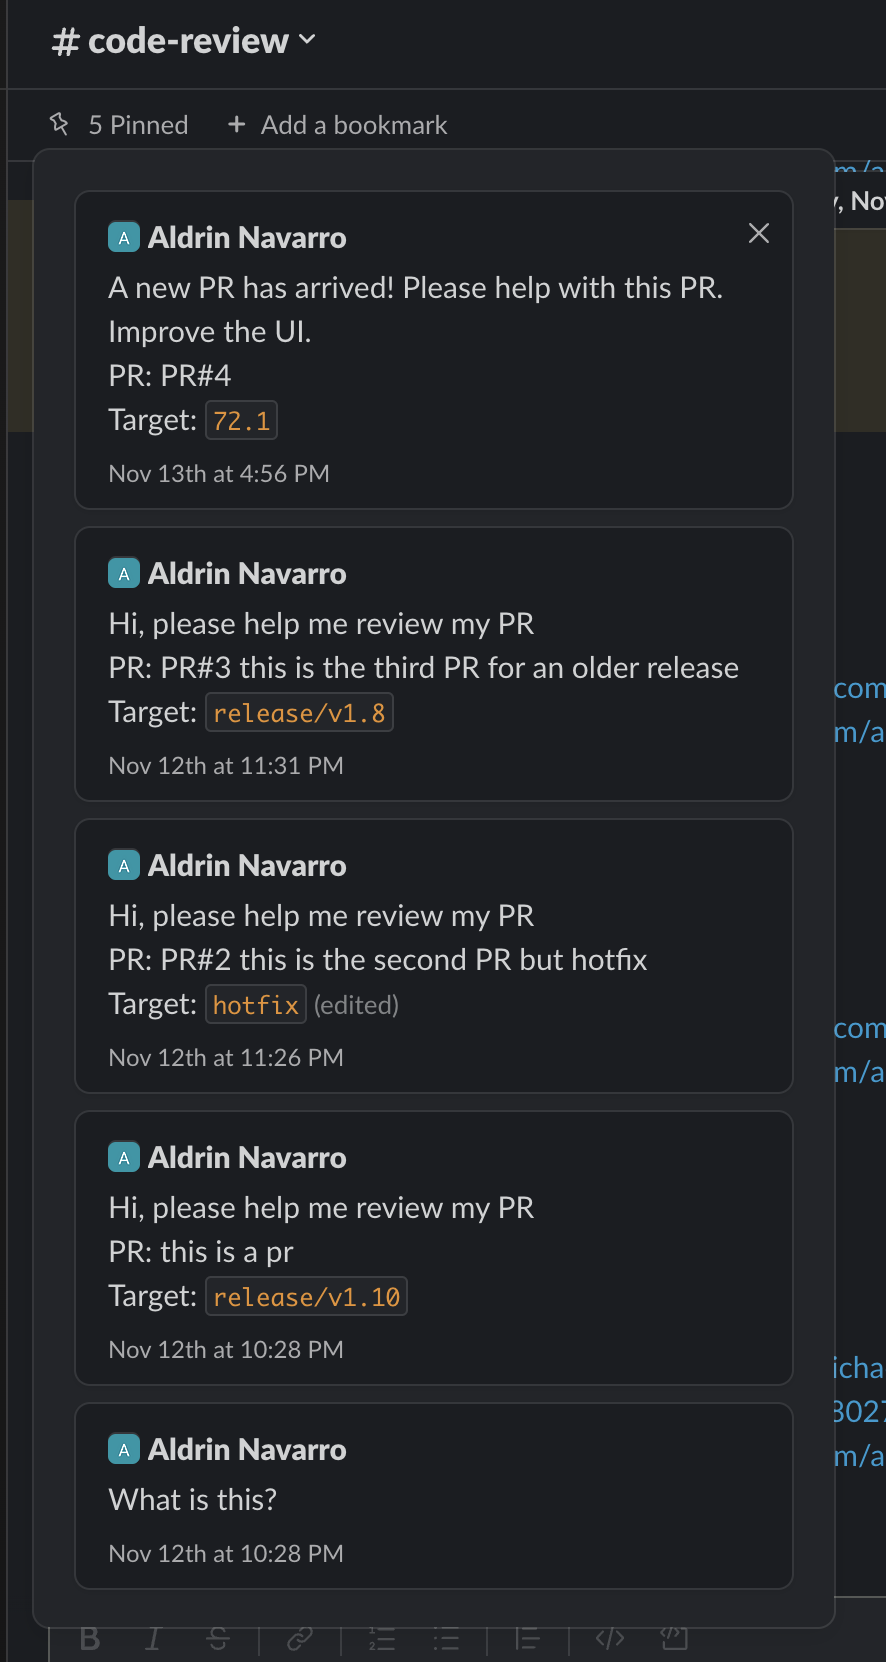
I’ve invited it to a test channel on my test Slack workspace and it’s able to respond to my commands with input fetched from pinned messages.
Some of the pinned messages:
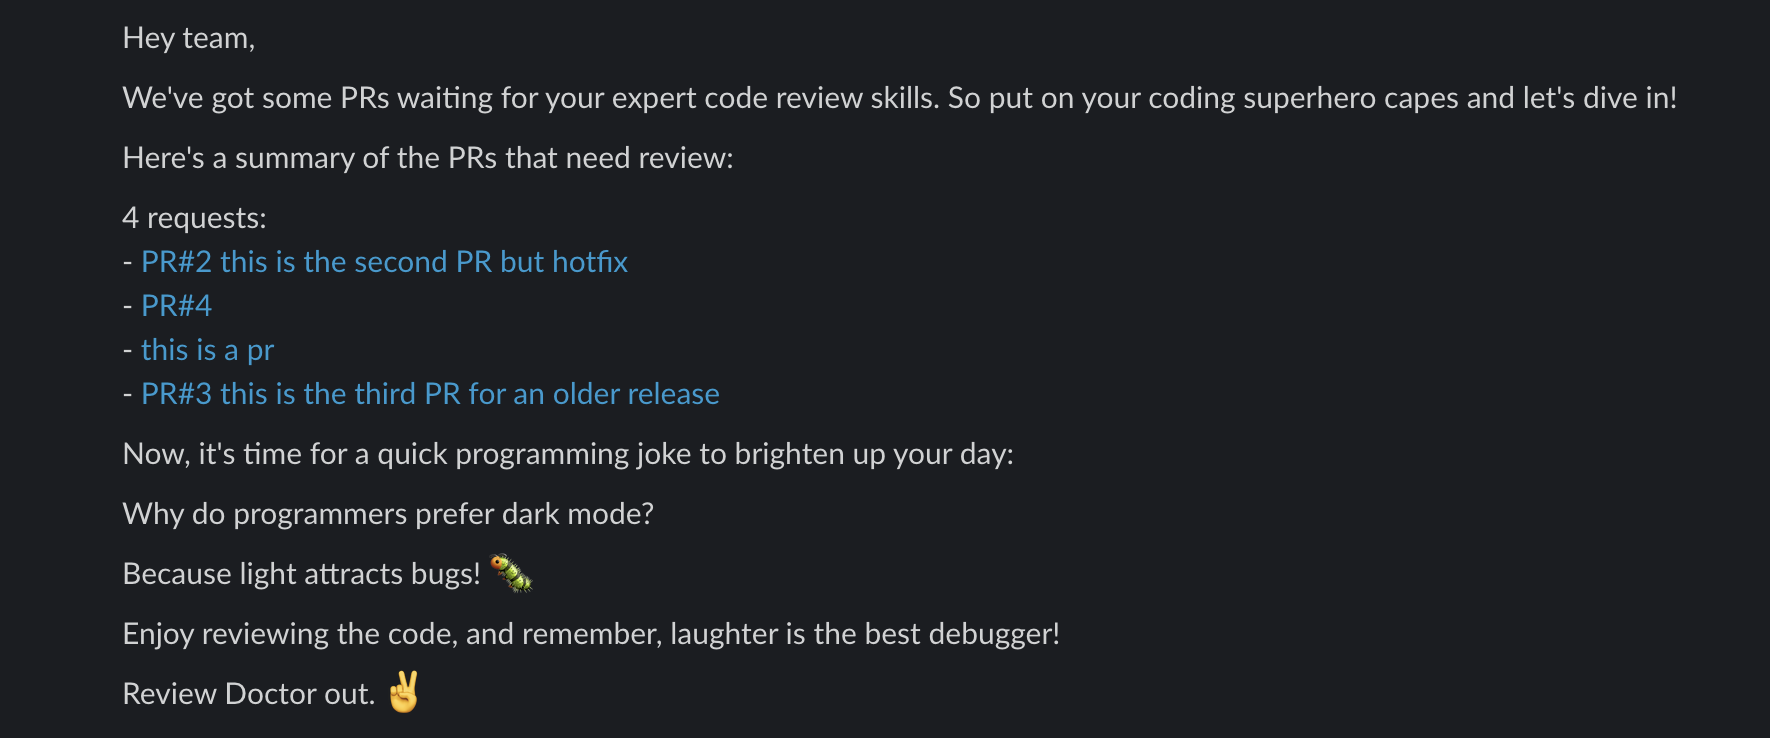
And here are the responses of the Slack Bot:
Here’s another one.
Here’s a video of the bot in action.
Next Steps
There are a lot of things that can be improved on this project. Here are some of the things I can think of:
- Exploring more conversational chains
- Deploying a serverless/function type of application rather than a Flask application
- Using a different LLM (via Ollama)
Definitely stay tuned for more updates on these explorations!
References
- Github Repo: https://github.com/aldnav/review-doctor-slack-bot
- “Slack AI Assistant with Python & LangChain” by Dave Ebbelaar


